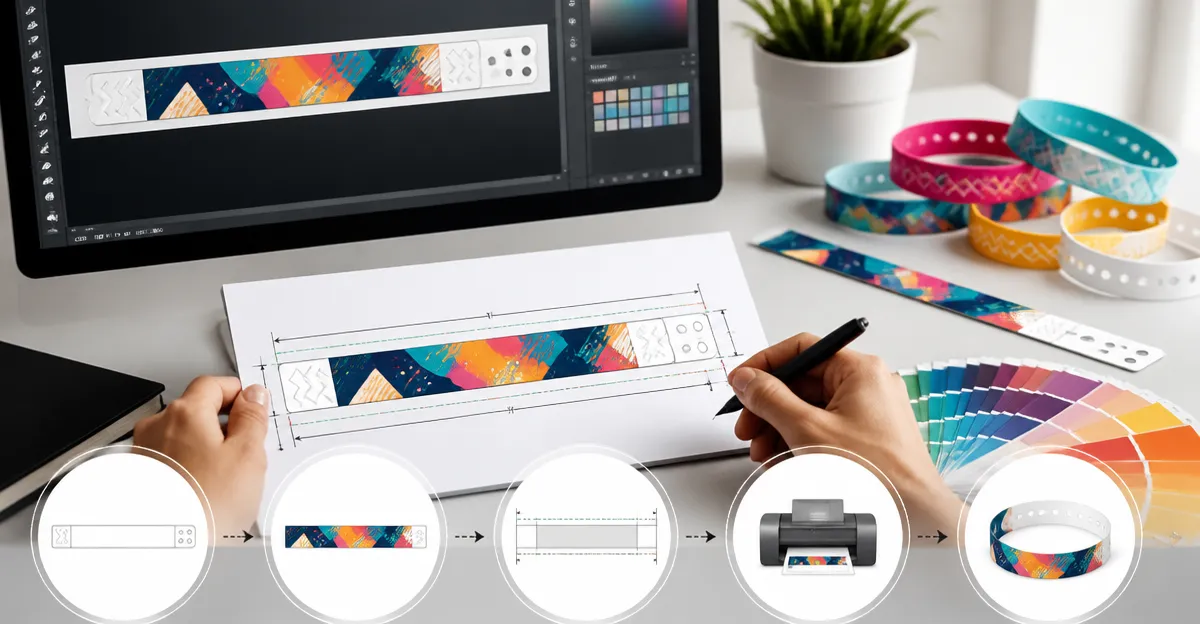
How to Create Custom Wristband Artwork: Exact Template Sizes, Bleed & Print-Ready Specs
Introduction
Designing artwork for event wristbands may appear straightforward, yet the precision required for template dimensions, bleed allowances, and colour fidelity often separates a successful rollout from a costly re‑print. In this guide, the reader will learn how to calculate exact wristband dimensions, set up safe zones, choose the appropriate colour mode, and export a printer‑ready PDF. By following each step, one can ensure that the final product looks professional, aligns perfectly on the band, and remains durable throughout the event.
The information presented is valuable for event planners, marketing teams, and graphic designers who need to produce wristbands that both identify attendees and reinforce brand imagery. While the process can be completed with generic design tools, the guide also highlights specific WristCo products that simplify handling, testing, and final deployment.
What You'll Need
- Computer with vector‑based design software (Adobe Illustrator, CorelDRAW, or the free Inkscape).
- Digital ruler or measurement tool to verify pixel‑to‑inch conversion.
- Access to high‑resolution wristband templates provided by the manufacturer.
- One of the recommended WristCo Tyvek wristband packs for final testing.
Step 1: Determine Exact Wristband Dimensions
The first technical task is to capture the physical dimensions of the wristband you intend to order. WristCo Tyvek wristbands typically measure 1.5 inches in width and 8.5 inches in length when laid flat, but the exact length varies with the size of the roll and the number of perforated sheets. For a standard 600‑piece pack, each sheet contains ten bands, meaning the printable area per band remains constant.
Measure the flat length of a single band with a ruler and record the value in millimetres (mm). Convert the measurement to points (1 pt = 0.3528 mm) because most print‑ready PDFs use points for page size. For example, a band that is 215 mm long translates to approximately 610 pt.
Document these dimensions in a text file; they will serve as the basis for the artboard size in the design software. Accurate measurement prevents scaling errors that could cause artwork to wrap incorrectly around the wrist.
Step 2: Set Up Bleed and Safe Zones
Bleed is the extra area that extends beyond the final cut line to accommodate minor shifts during printing and trimming. WristCo recommends a 0.125 inch (3 mm) bleed on all sides of the artwork. Therefore, add 0.25 inch to both the width and length of the artboard.
Next, define a safe zone at least 0.125 inch inside the trim line. Any critical text, logos, or colour‑sensitive elements should reside within this zone to avoid being clipped. In practice, create three concentric rectangles: the outermost representing the bleed edge, the middle representing the trim line, and the innermost representing the safe zone.
Label each rectangle in the design file to avoid confusion when multiple designers collaborate. This visual guide ensures that all stakeholders understand where artwork may be trimmed and where it must remain fully visible.
Step 3: Choose Colour Mode and Resolution
For wristband printing, the industry standard is CMYK colour mode because the inks are applied using a four‑colour process. Converting RGB files to CMYK after design can shift hues, especially bright neons. Set the document colour mode to CMYK at the outset to maintain colour integrity.
Resolution should be set to a minimum of 300 dpi (dots per inch) for raster images embedded within the vector file. This level of detail prevents pixelation when the band is examined up close, a common scenario at entry gates where staff scan wristbands for authenticity.
If the design incorporates spot colours for brand consistency, confirm with the printer that those spot inks are supported. WristCo’s standard printing process can accommodate both CMYK and a limited set of spot colours, but additional fees may apply.
Step 4: Create the Template in Your Design Software
Open a new document using the dimensions calculated in Step 1 plus bleed (e.g., 8.75 in × 2.0 in for a 1.5 in × 8.5 in band). Place the three rectangles from Step 2 on locked layers to serve as guides. Begin by importing the brand logo as a vector file (AI, EPS, or SVG) to preserve scalability.
Position the logo within the safe zone, ensuring a minimum clearance of 0.125 inch from the trim line. Add any additional text, such as event name or sponsor tags, using legible typefaces no smaller than 6 pt. For neon‑coloured events, consider using Pantone equivalents that approximate the bright hues of the wristbands.
When the design is complete, group all visible elements and hide the guide layers. Save the working file in the native format of your software to allow future edits, then prepare for export.
Step 5: Export a Print‑Ready PDF
Export the artwork as a PDF/X‑1a file, which embeds all fonts and colour profiles, guaranteeing that the printer receives an unaltered file. In the export dialog, select "Use Document Bleed Settings" and ensure that "Crop Marks" are enabled; these marks assist the printer in aligning the cut line with the bleed area.Before sending the file, perform a final proof by opening the PDF on a calibrated monitor. Verify that all text remains within the safe zone and that no unintended elements extend beyond the bleed edge.
If the event requires multiple colour variations (e.g., different wristband colours for staff versus attendees), create separate PDF files for each variant. Maintaining a clear naming convention—such as "EventName_Staff_NeonGreen.pdf"—prevents confusion during the ordering process.
Step 6: Order the Wristbands and Apply Your Artwork
With the print‑ready PDFs prepared, the next step is to select the appropriate WristCo product that matches the event's colour scheme and quantity requirements. The following products are recommended based on common scenarios:
- Neon Green Wristbands – This 600‑piece pack offers a vivid neon green colour that enhances visibility in low‑light environments. Priced at $8.88, it carries a 4.8‑star rating from 1,999 reviews. The tamper‑proof adhesive closure ensures that the wristbands cannot be reused, making them ideal for ticketed concerts or festivals.
- 6‑Color Pack Wristbands – For events that require colour‑coding of staff, volunteers, and attendees, this 600‑piece variety pack provides six distinct neon shades. At $8.88 and a 4.8‑star rating, it offers flexibility without increasing budget. The unique colours are difficult to counterfeit, adding an extra layer of security.
- 5‑Color Pack Wristbands – When a larger quantity is needed, the 1,000‑piece pack delivers five colour options at $13.88. The higher volume reduces per‑unit cost and is suitable for multi‑day conferences or large‑scale sporting events.
- Neon Red Wristbands – The bright neon red variant is perfect for emergency staff or VIP access, as the colour stands out against most backgrounds. It shares the same $8.88 price point and 4.8‑star rating as the green version.
- Neon Green 1,000 Wristbands – For organisations planning multiple events throughout the year, the bulk 1,000‑piece pack at $14.88 provides economies of scale while maintaining the same high‑quality DuPont Tyvek construction.
When placing the order, upload the corresponding PDF for each colour variant. WristCo’s online portal allows you to match the PDF to the selected band colour, ensuring that the artwork aligns correctly with the printed surface.
After receiving the wristbands, perform a quick quality check by applying a sample band to a wrist and confirming that the artwork prints sharply and that the adhesive holds for the expected duration. The tamper‑proof feature will cause the band to tear upon removal, preventing reuse.
Tips & Pro Tips
- Always proof the PDF on a colour‑calibrated monitor before sending it to print; a slight shift in neon hue can be noticeable on the final band.
- Use a permanent marker to add a discreet serial number or event code on the back of the band for extra security.
- If the event includes children, choose the softer‑edge Tyvek material to avoid skin irritation; all WristCo bands feature a cloth‑like edge that reduces the risk of paper cuts.
- Store unused wristbands in a cool, dry place to maintain adhesive strength; humidity can weaken the bonding surface.
- For rapid distribution, pre‑cut the perforated sheets into individual bands using a guillotine cutter; the perforations are designed for easy separation.
Troubleshooting
| Problem | Possible Cause | Solution |
|---|---|---|
| Artwork appears shifted on the band | Bleed not accounted for or PDF exported without bleed | Re‑export PDF with "Use Document Bleed Settings" enabled and verify crop marks. |
| Colours look dull compared to screen preview | RGB file used or printer unable to reproduce neon pigments | Convert all assets to CMYK and request a printed proof from the printer before full run. |
| Adhesive does not stick to skin | Band stored in high humidity or surface contaminated | Keep bands in sealed packaging until use and ensure skin is clean and dry before application. |
Conclusion
Creating custom wristband artwork demands careful attention to template dimensions, bleed allowances, colour mode, and file export settings. By following the six steps outlined above, one can produce print‑ready PDFs that align perfectly with WristCo's high‑quality Tyvek wristbands. The recommended products streamline the testing and deployment phases, ensuring that the final wristbands are both visually striking and tamper‑proof. Apply these practices to future events, and the wristbands will consistently reinforce brand identity while facilitating smooth crowd management.
Products Mentioned in This Guide
Frequently Asked Questions
What are the exact template dimensions for a standard silicone wristband?
A typical silicone wristband template is 2.5" wide with a 6" circumference, but always confirm the specific size with your supplier.
How much bleed should I include in my wristband artwork?
Add a 0.125" bleed on all sides to ensure the design extends beyond the safe zone and avoids white edges after trimming.
Which colour mode is required for wristband printing?
Use CMYK colour mode to match printer inks and maintain colour fidelity across the final product.
What file format should I export for a printer‑ready wristband design?
Export a high‑resolution PDF (300 dpi) with all fonts outlined and images embedded.
Can I create wristband artwork with free software?
Yes, Inkscape supports vector design, bleed setup, and PDF export, making it suitable for wristband projects.